Automatic Labor Scheduling - Step by Step
With the automatic planning assistant, you can fill unstaffed shifts with employees and thus create duty rosters automatically. This saves you a lot of time and mental effort. Of course, you still have full control over your duty roster: you can make manual changes at any time, and your employees will only be notified once you release the plan.
Preparations for a successful automated allocation
For the automated allocation to be successful, a few points must be observed:
Availability: Make sure that the availabilities of the employees are correctly recorded. In Nesto, availability is generally understood as contractual availability, so an employee will only receive shifts that fall completely within their availability.
Qualifications: The employee must have the qualification to work at the positions where you want to assign them. The qualification level must be at least "Beginner" for the employee to be assigned automatically. "Advanced" and "Professional" employees can be assigned to all shifts at the corresponding position.
Absences: Enter all employee absences before you start scheduling. Only if Nesto knows that the employee is unavailable can it take this into account accordingly.
Which shifts are filled by the automatic planning assistant?
All unstaffed shifts within the planning period are considered, whether they are automatic shift proposals or manually created, and as many as possible are filled. The only exceptions are shifts that violate legal requirements (such as maximum shift lengths or break regulations); these will always remain unstaffed.
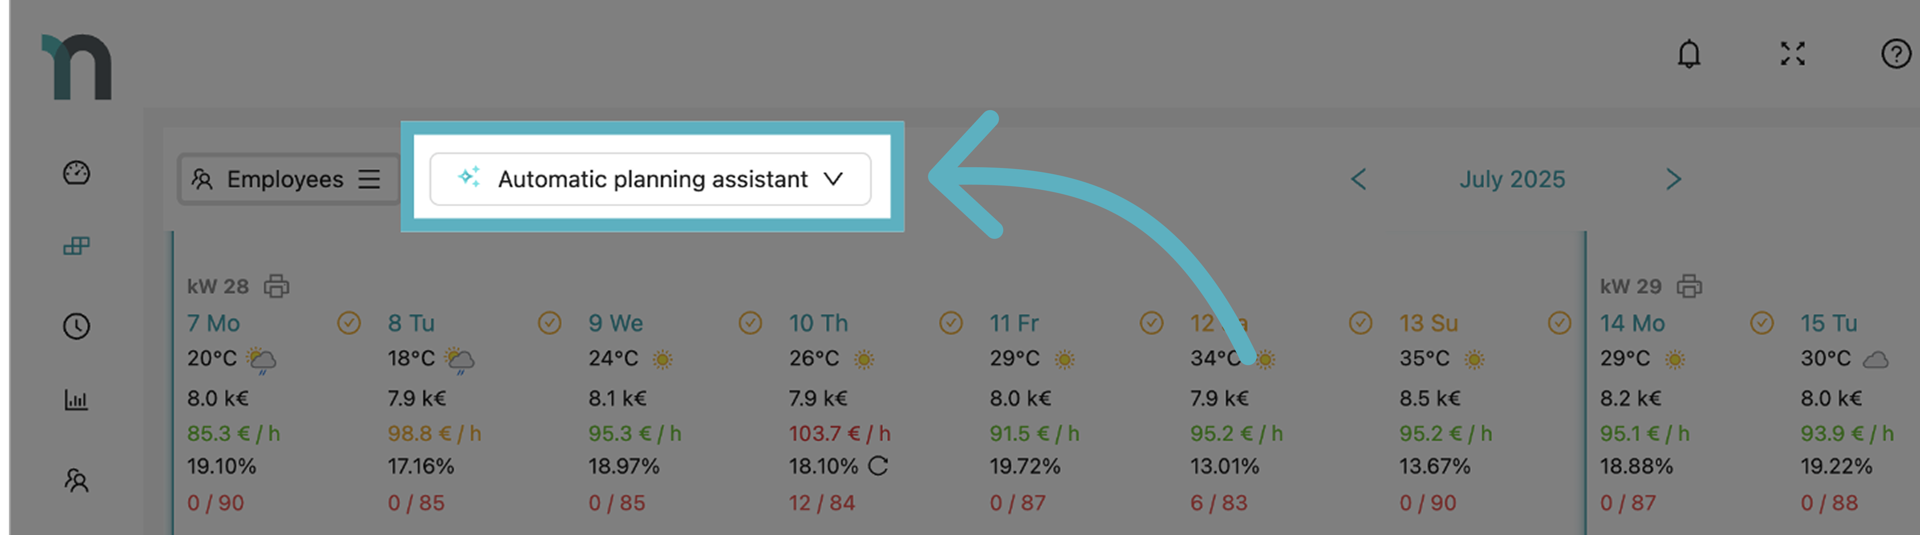
Planning shifts with the automatic planning assistant
Have the duty roster generated by our automatic planning assistant.
Open the Automatic Planning Assistant.
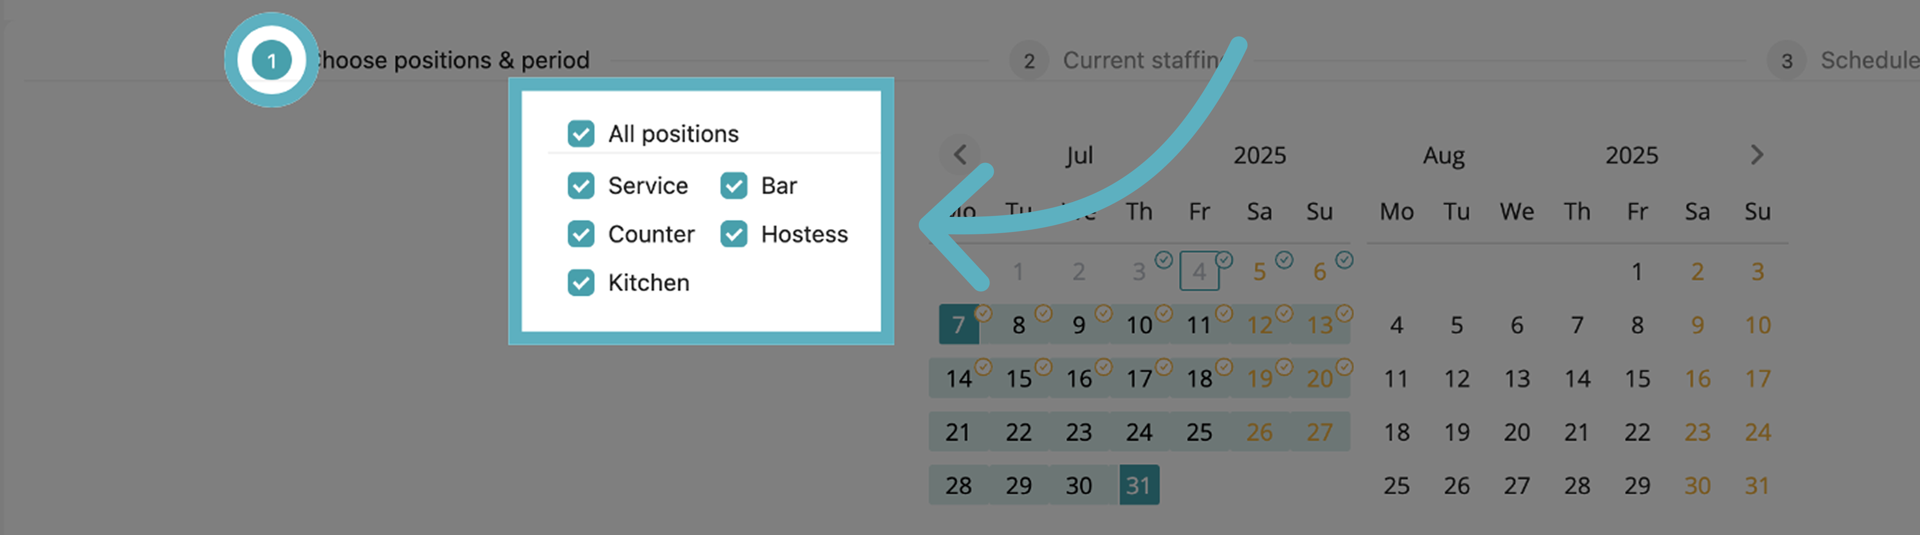
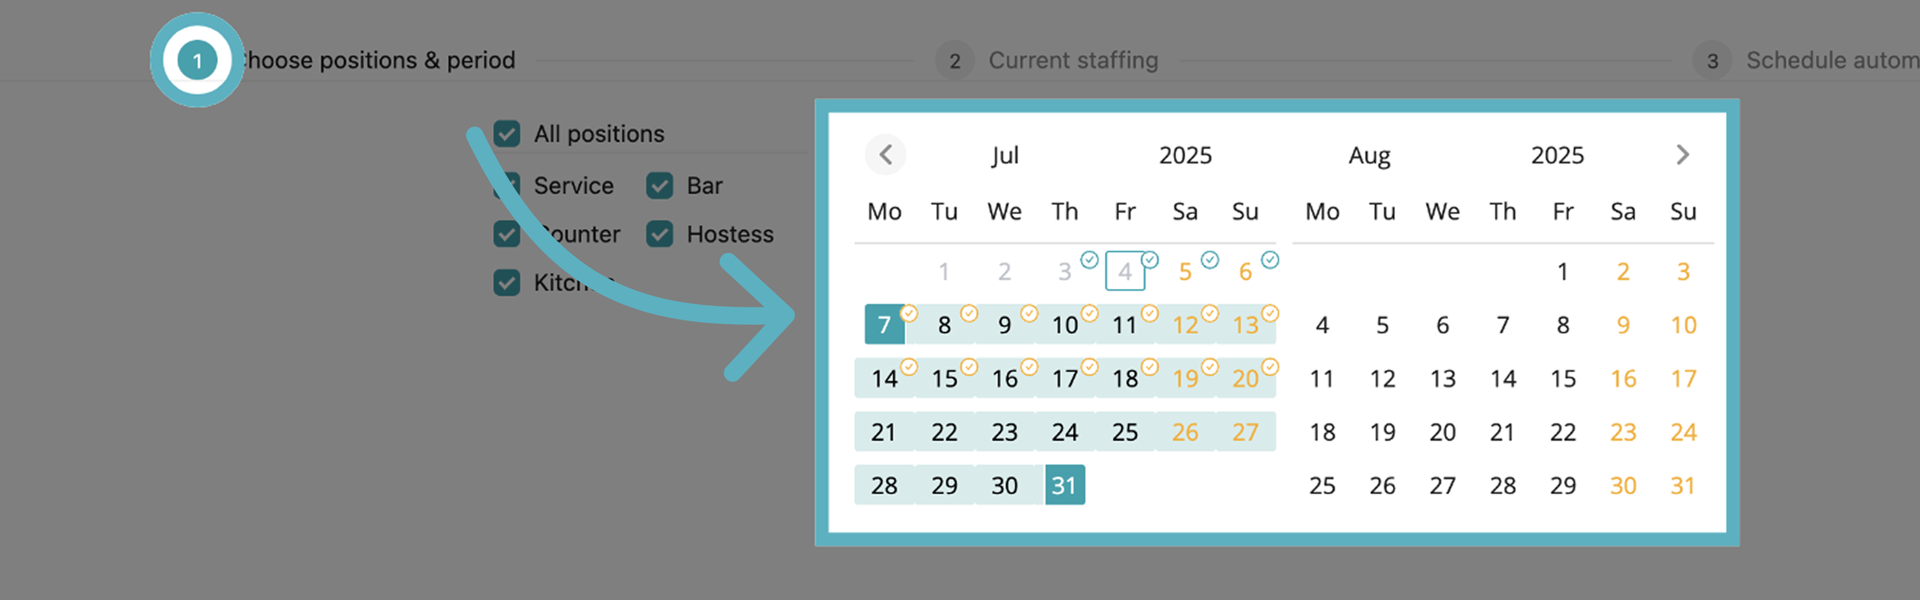
Select the desired positions and the desired period.
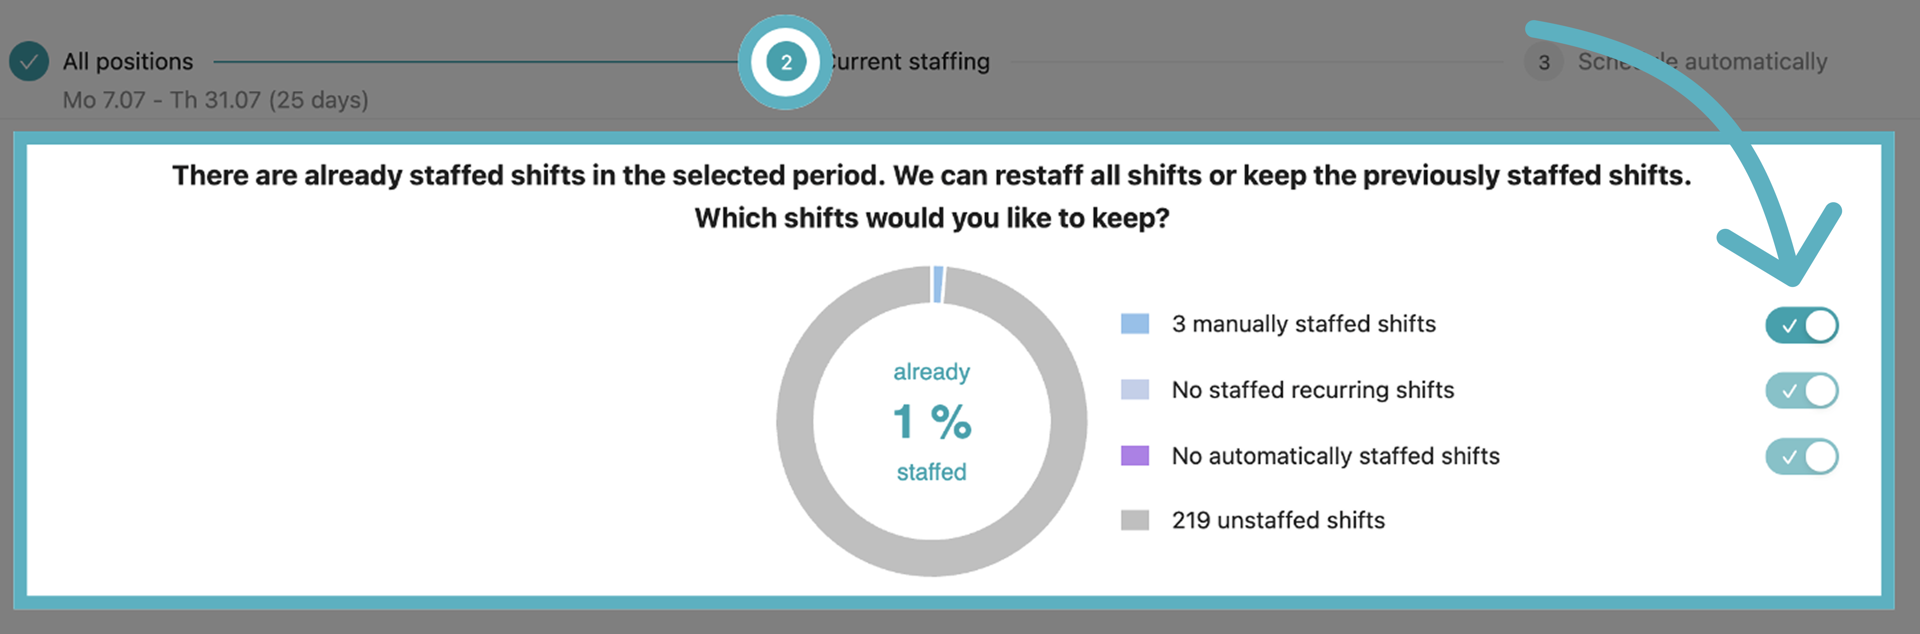
Decide what should happen with existing shifts. Should they be kept or reassigned?
Start the automatic planning.
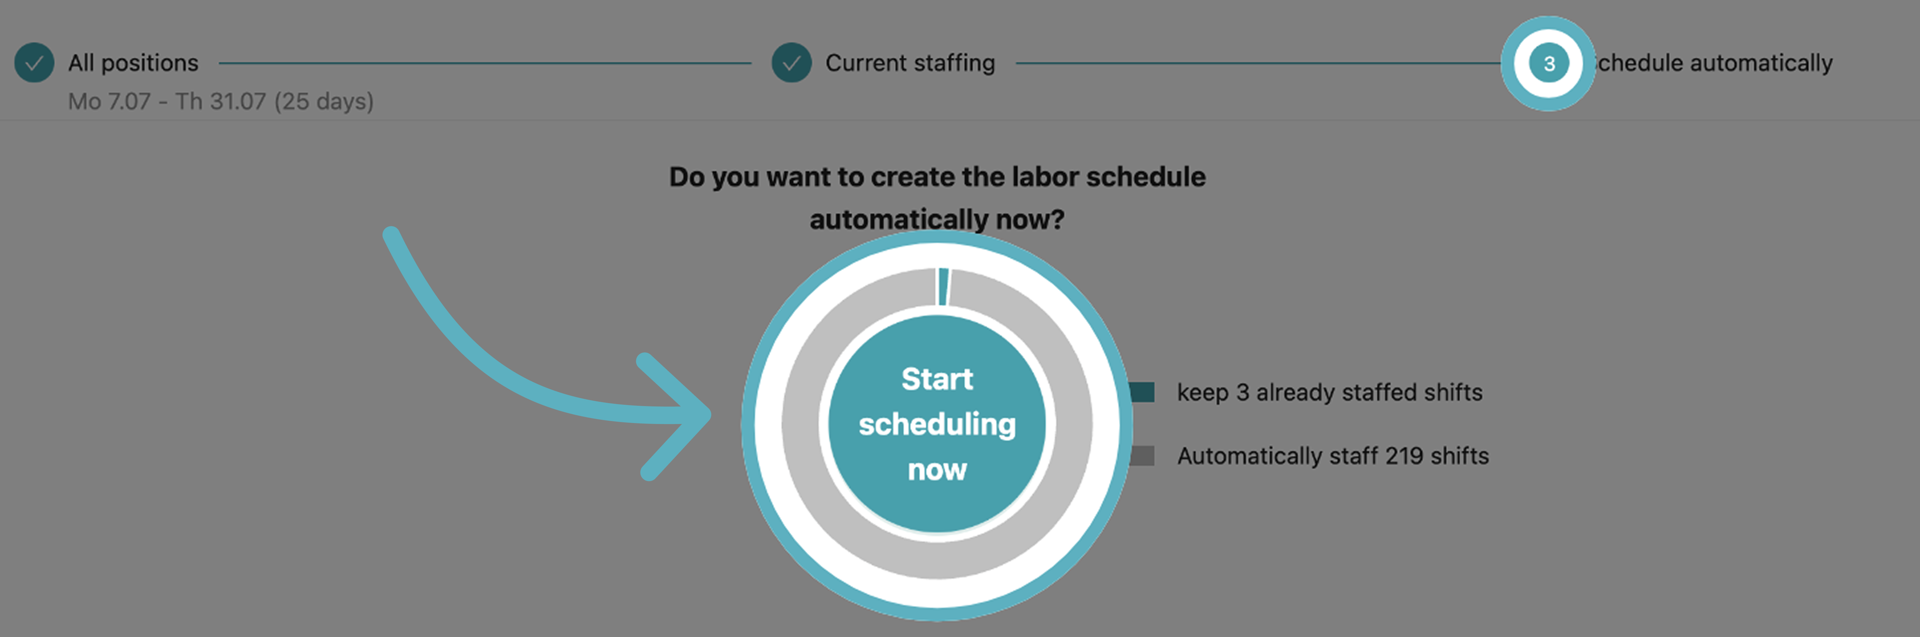
The assistant now automatically plans the staffing and shows the result in less than a minute.
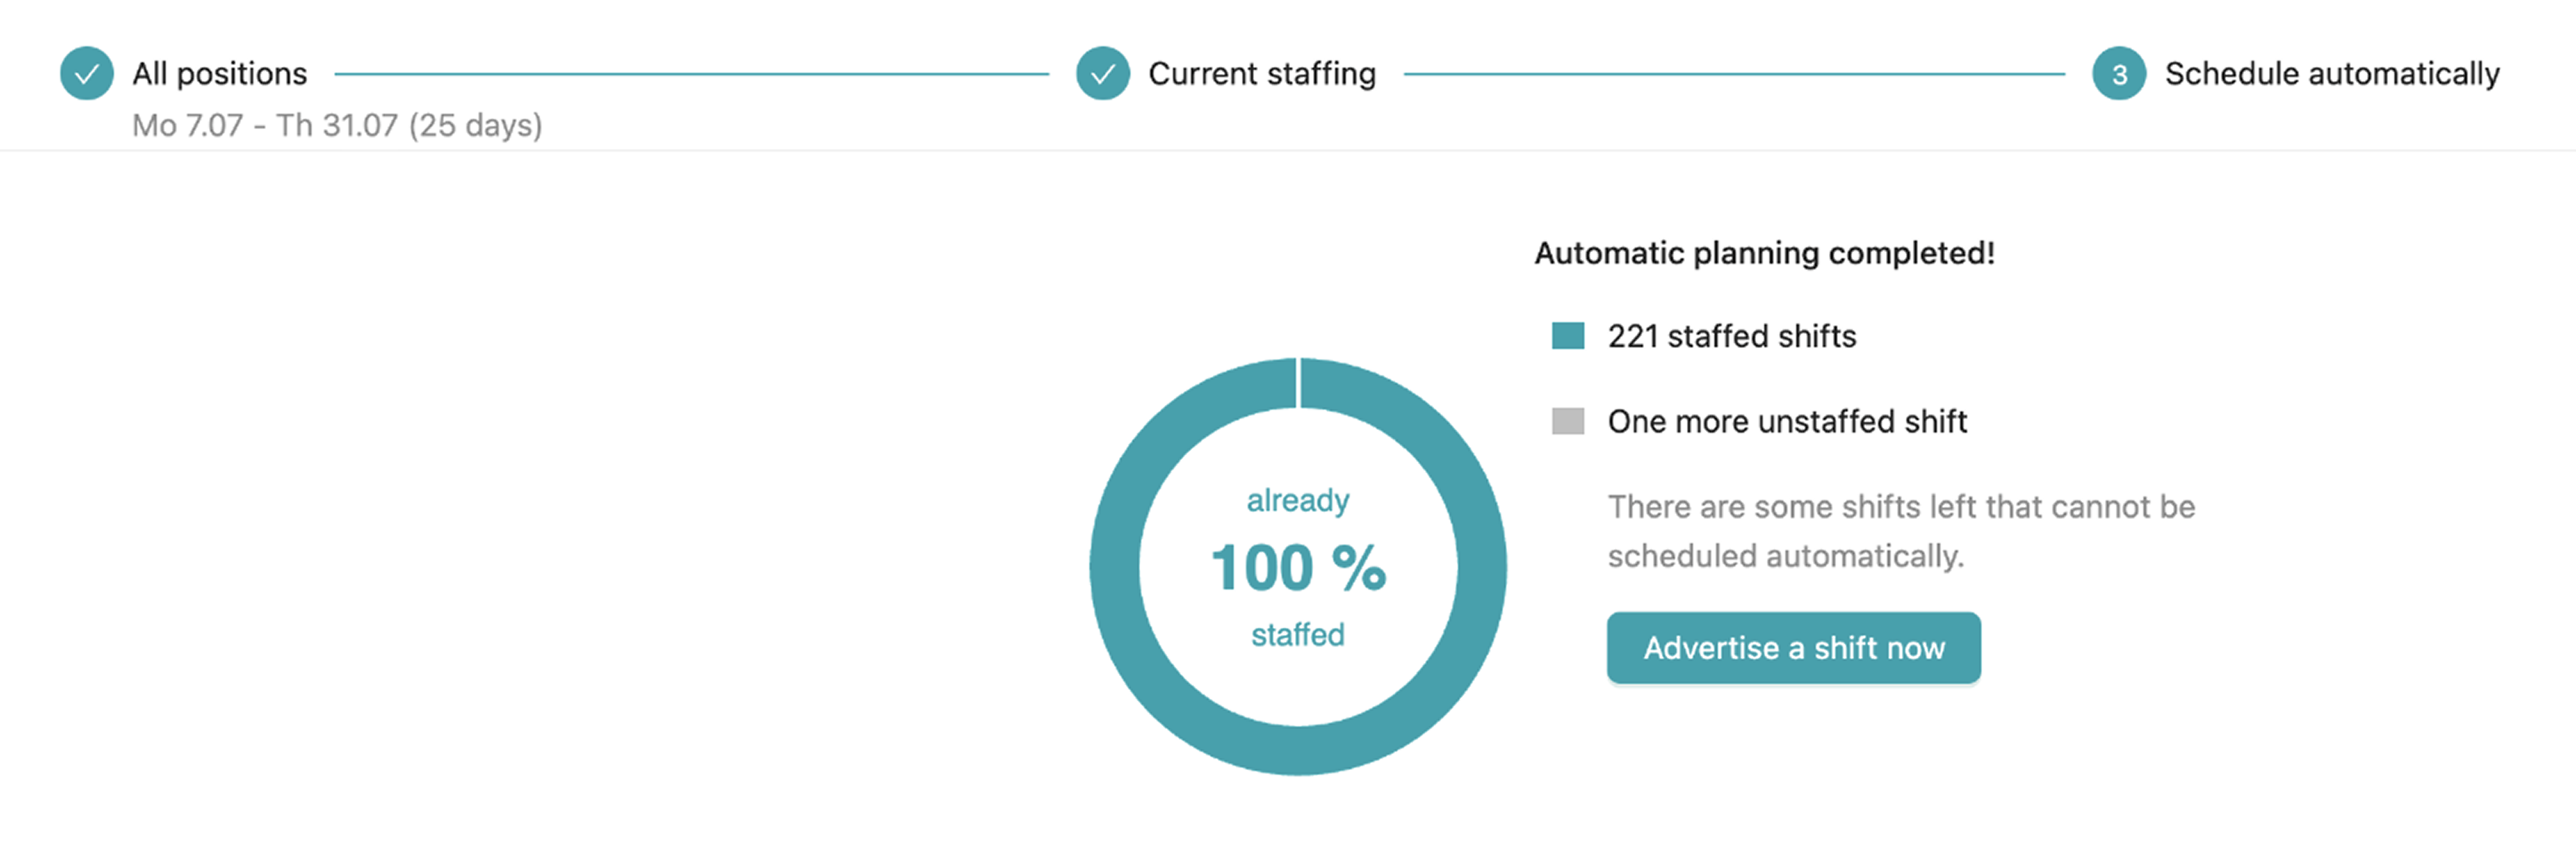
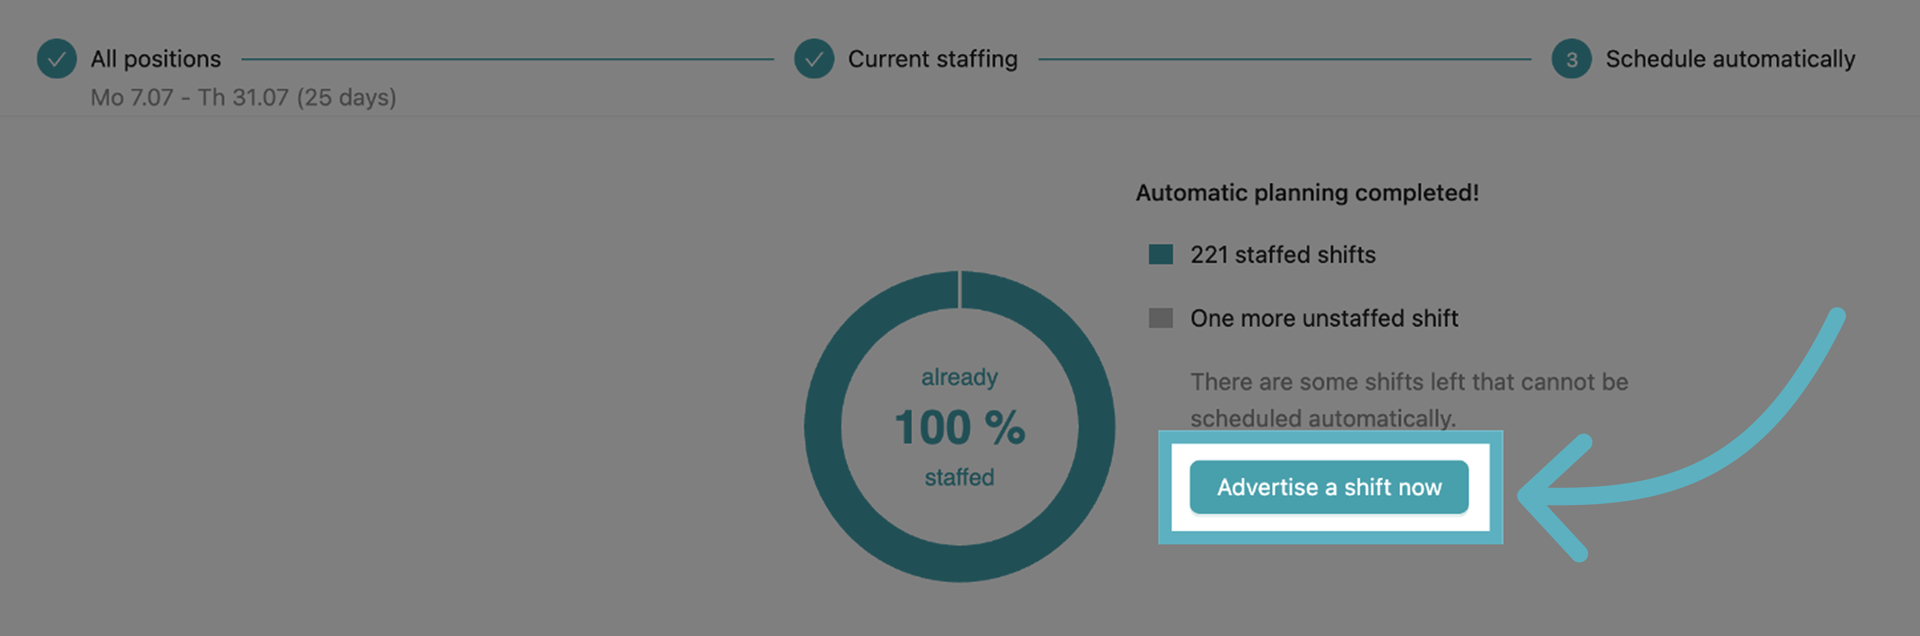
You can now manually adjust the planning. If shifts remain unstaffed, the shifts can also be advertised so that employees can apply for them themselves.
Shifts can also be quickly and easily swapped between two employees. To do this, right-click on the shift you want to swap and then select the shift to be exchanged.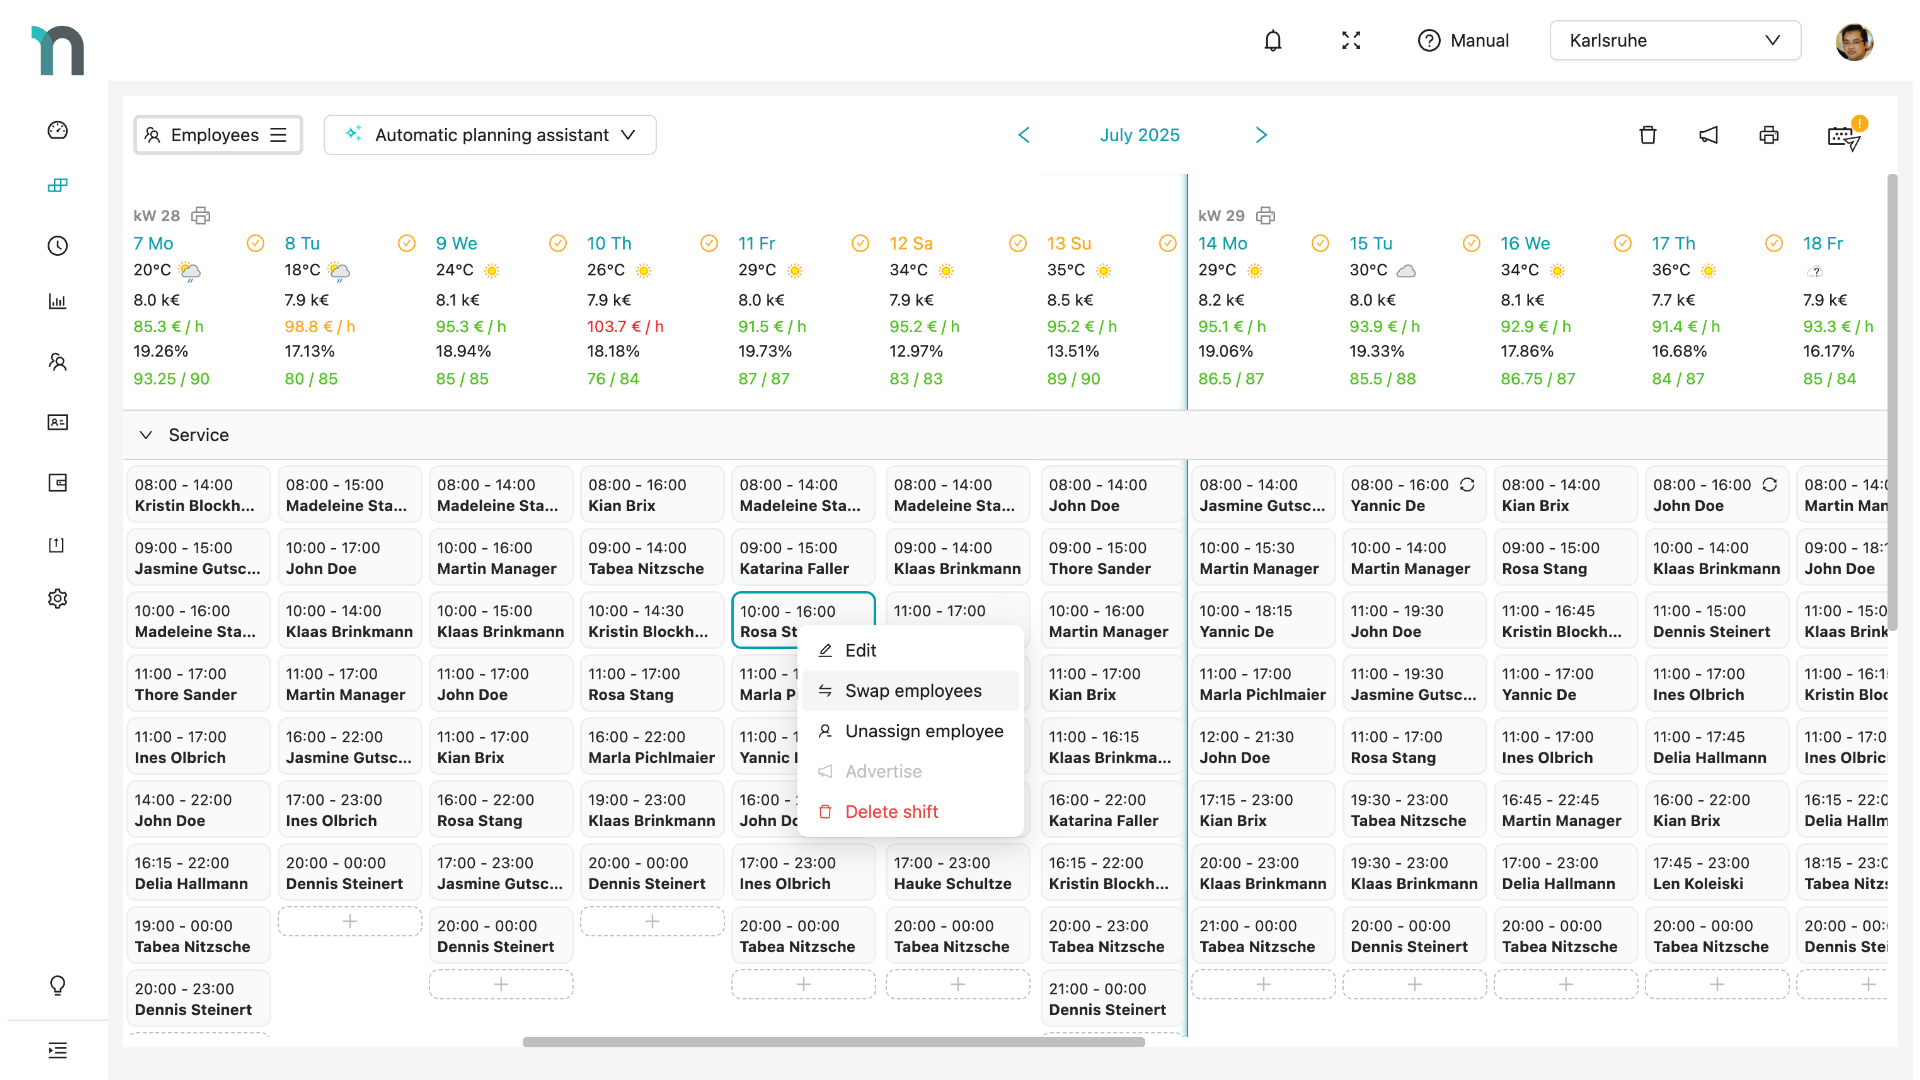
In the final step, you can release the labor schedule so that employees are notified.
How can I manually intervene in the planning?
Even with automatic duty scheduling, you retain full control over the duty roster. At no point during the automatic scheduling are manual changes overwritten without your explicit confirmation. The planning is done around your existing "framework."
At every step, you can use your expertise to create exactly the right duty roster for your company.
Are special events planned or has a large group announced their arrival? → Override the automatic sales forecast with your expectation.
Are there certain shifts that must be exactly the same every day, or employees who can only work at the same time? → Create recurring shifts and assign employees if necessary.
After automatic planning, you can adjust or swap shifts. Your employees will only be informed once you release the labor schedule. How to release the labor schedule can be found here.