Monthly planner
The monthly planner provides an overview of all shifts for the month, divided into the different positions. At the top, you can see key figures and sales forecasts, as well as the weather for each day. An overview of the key performance indicators of the monthly planner can be found here.
By clicking on the date, you can jump directly to the day analysis.
Using the automatic staff scheduling, you can create shift plans for a desired period within the monthly planner. More information about the automatic staff scheduling can be found here.
Creating shifts
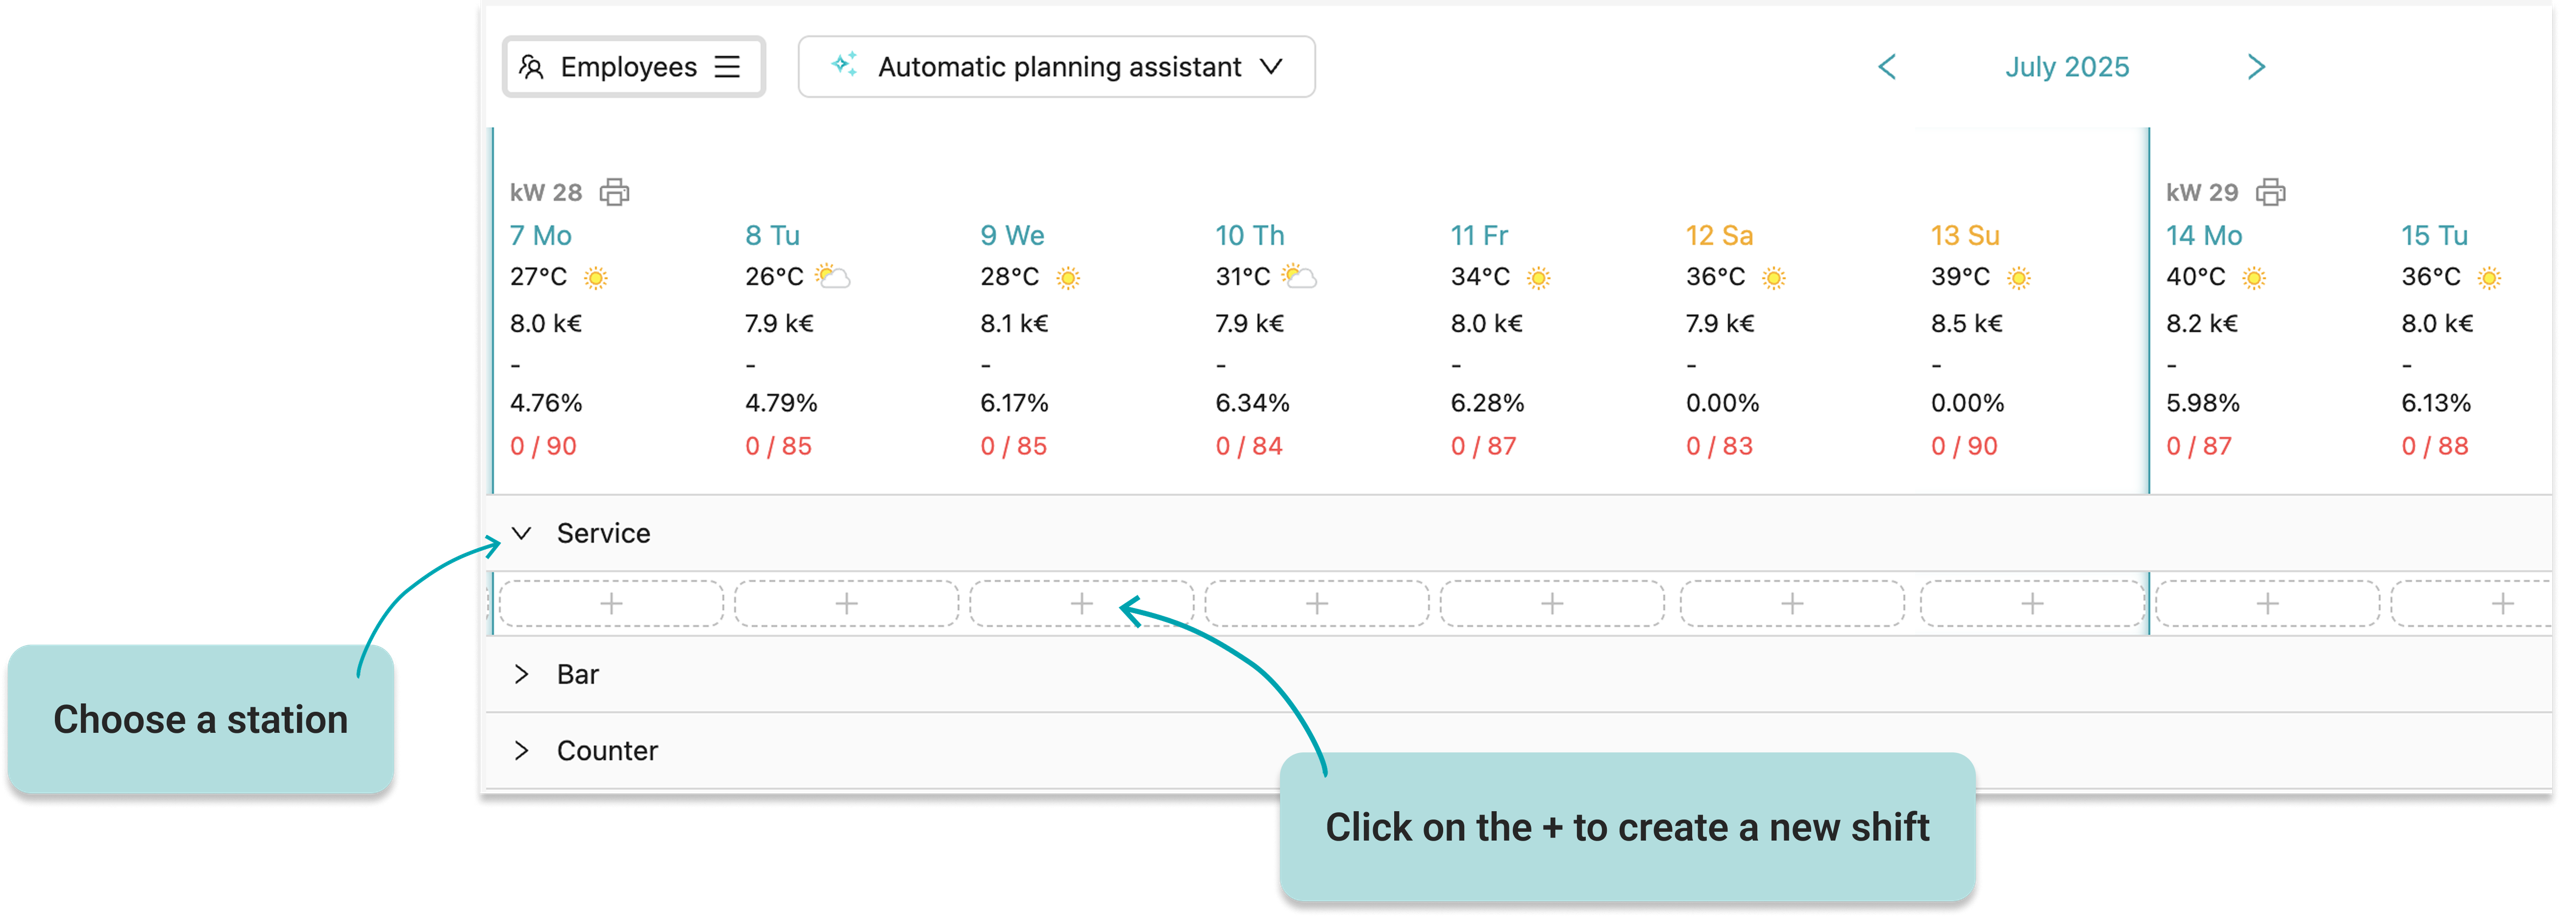
New shifts can be planned by first selecting a position in the monthly planner and then clicking the “+” button.
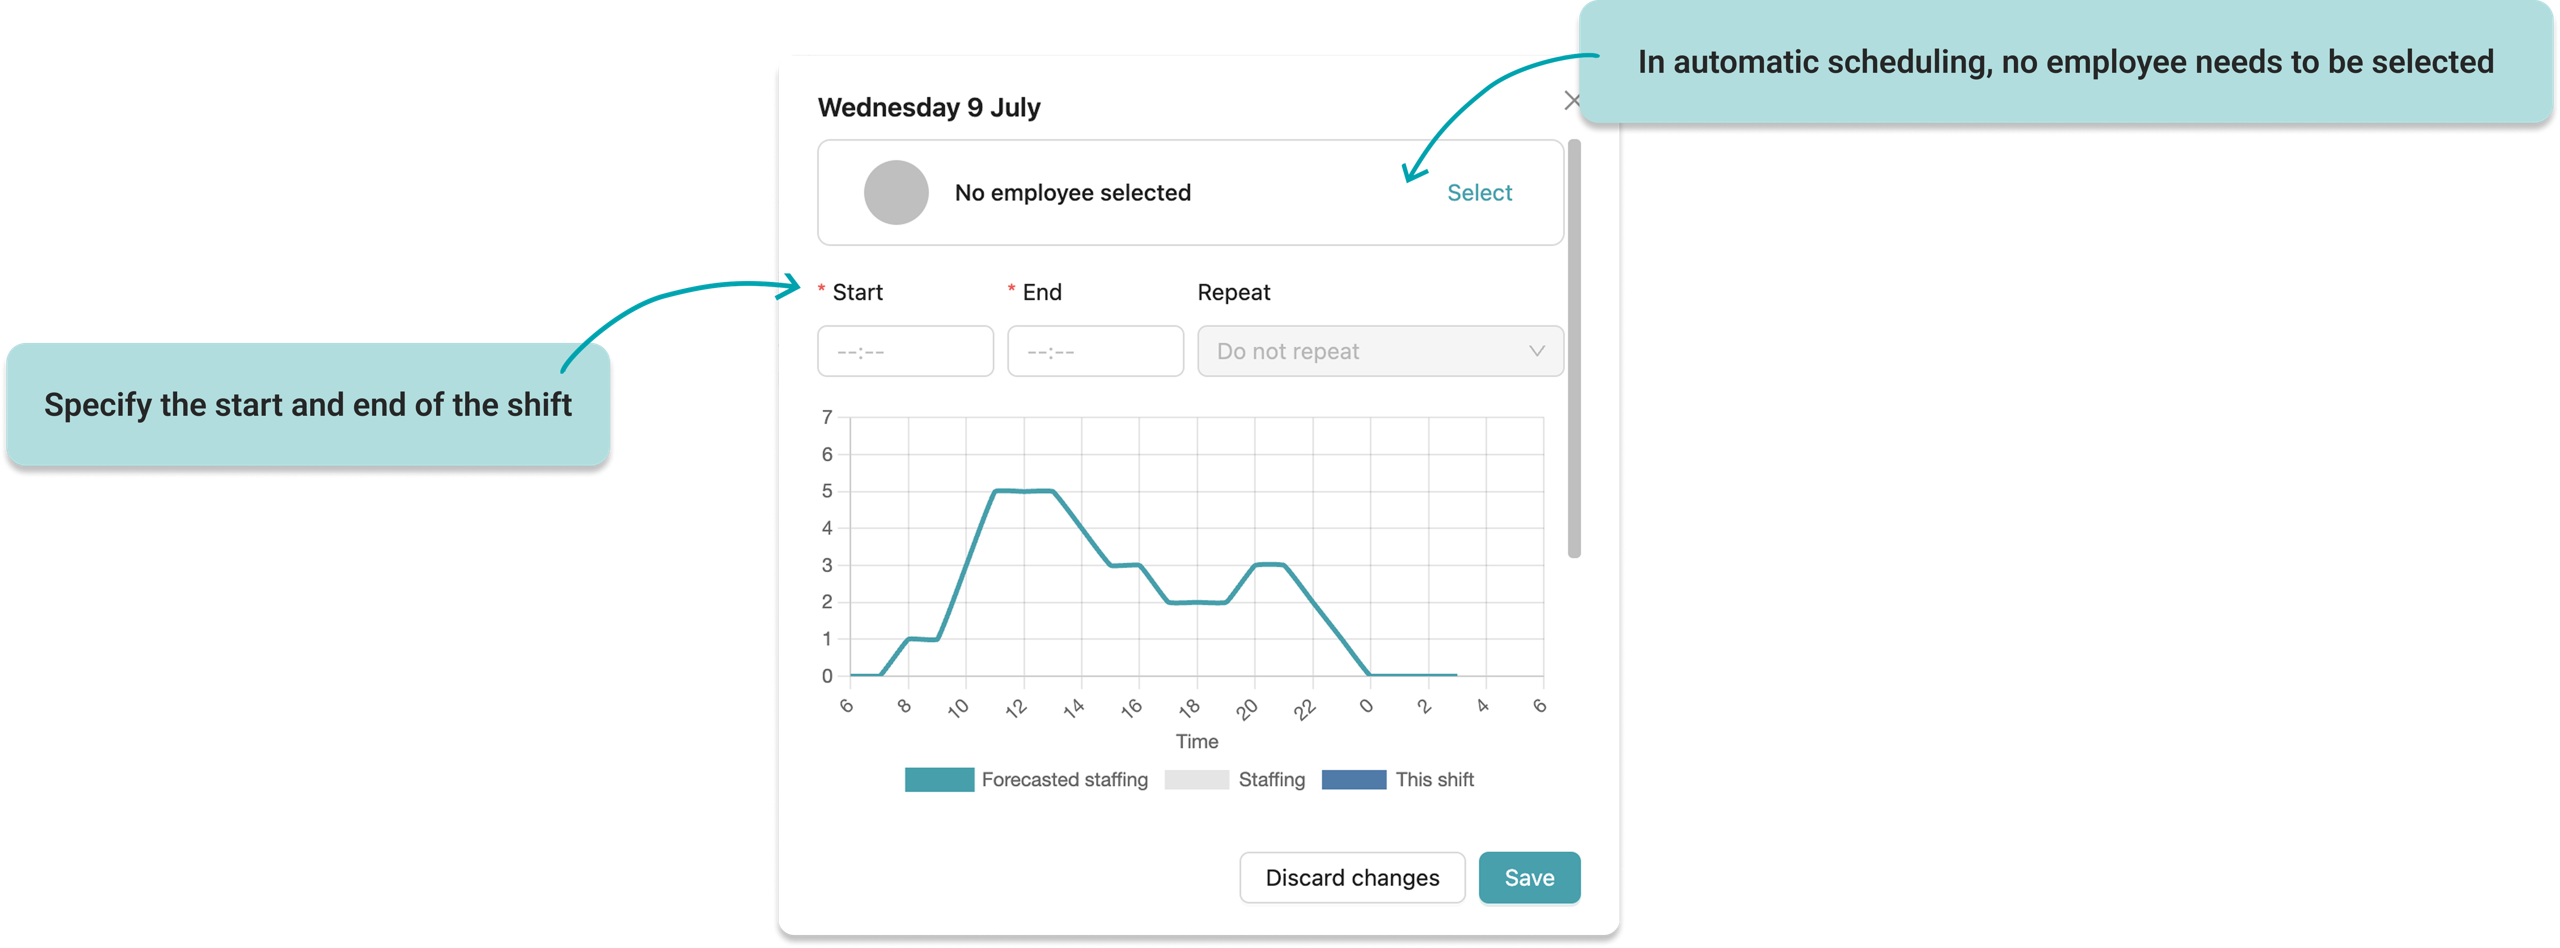
Then enter the basic data. If you do not select an employee at this point, only a so-called shift shell will initially be created in the monthly planner, which you can later assign to an employee, either manually or using the automatic planning assistant.
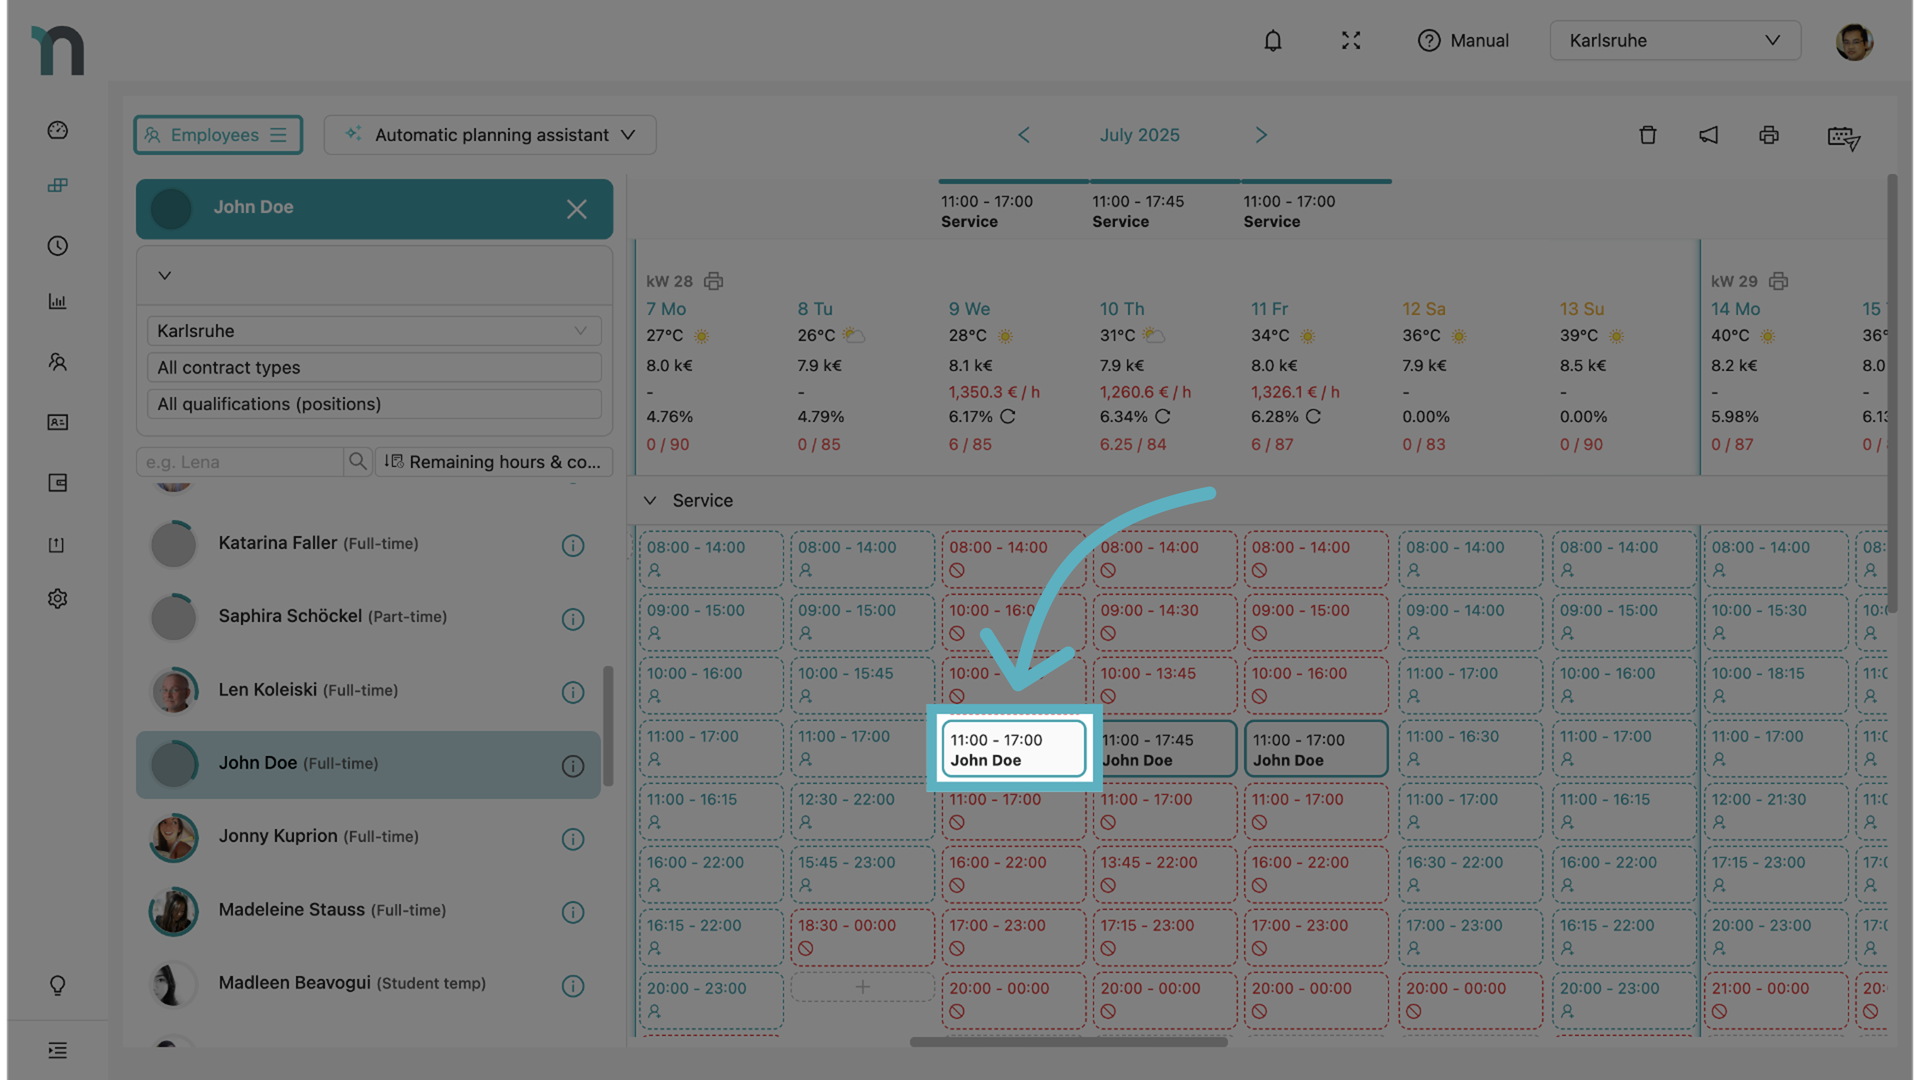
How can I assign an employee to multiple shifts at once?
With the chain entry, an employee can be assigned to multiple shifts easily and conveniently.
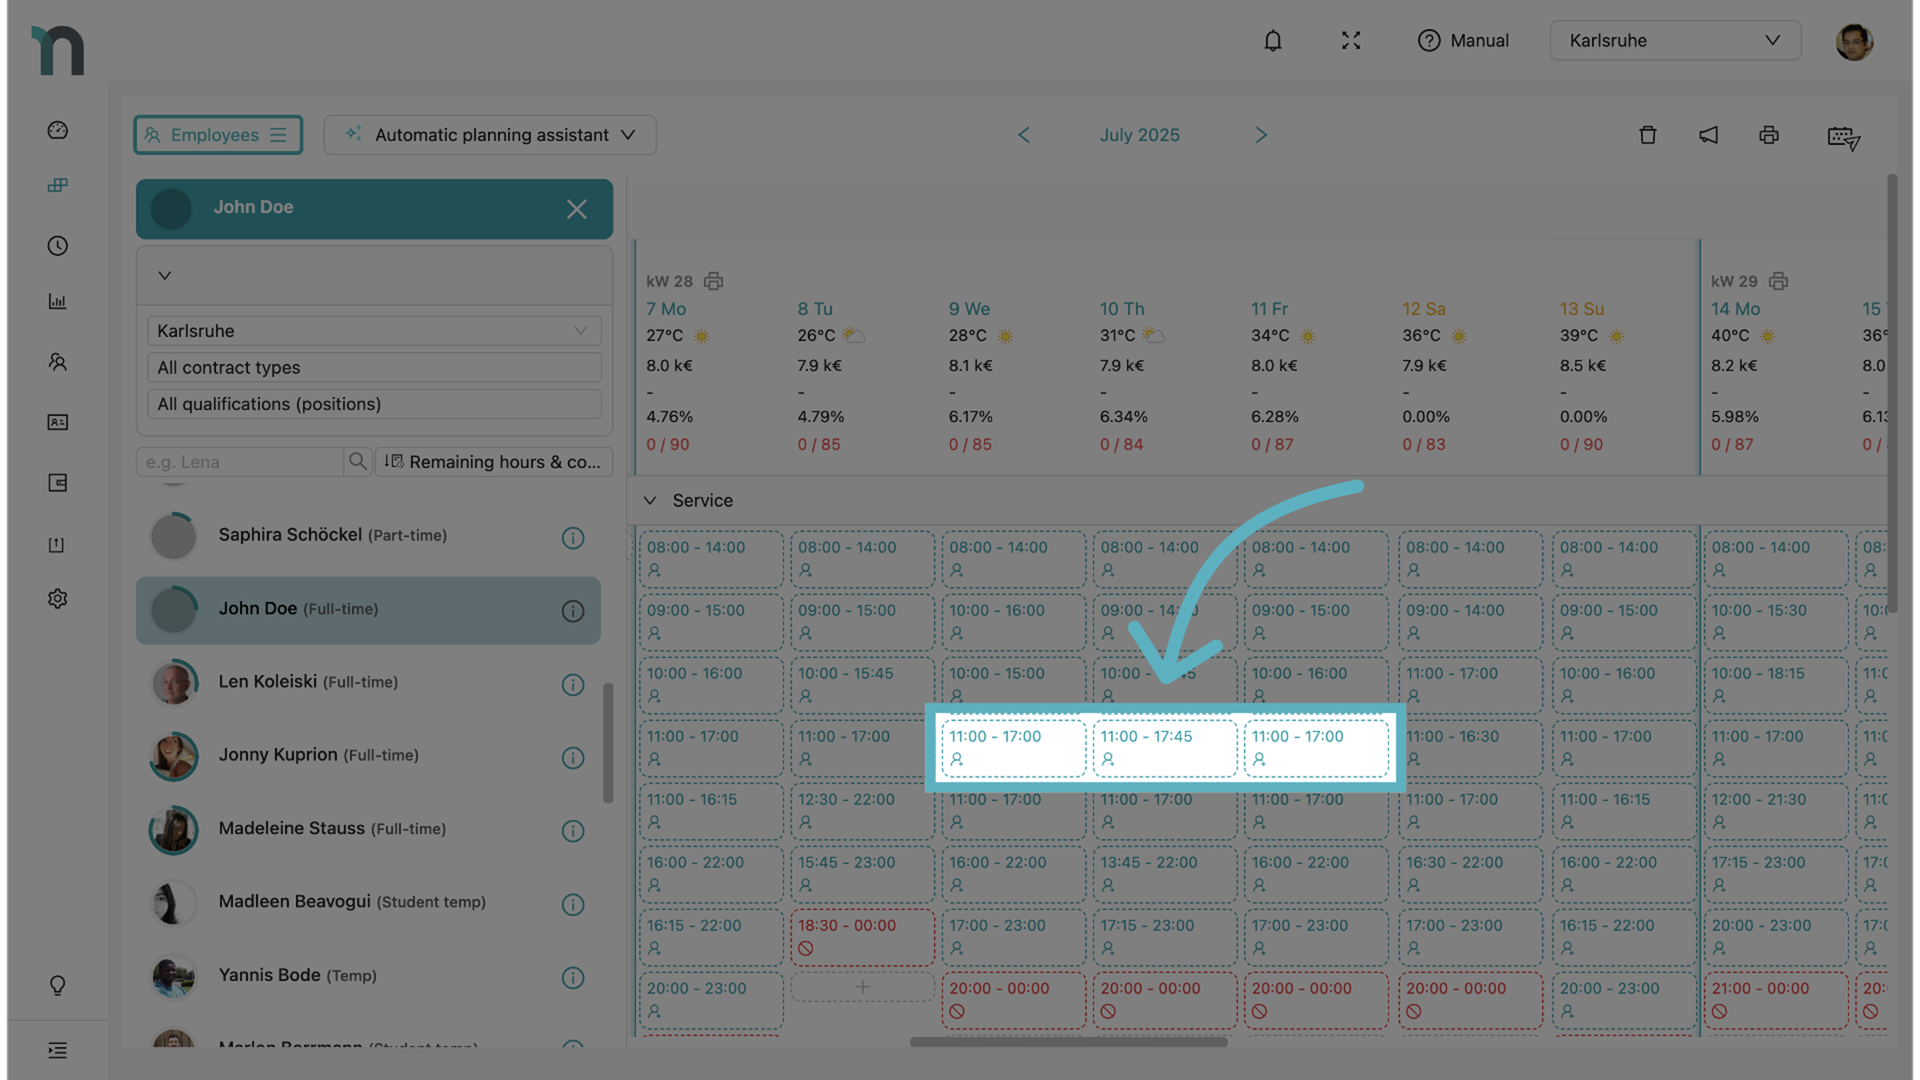
Select the employee in the employee list. The selected employee will be highlighted in the employee list. Additionally, the name and avatar will be displayed in the upper right corner.
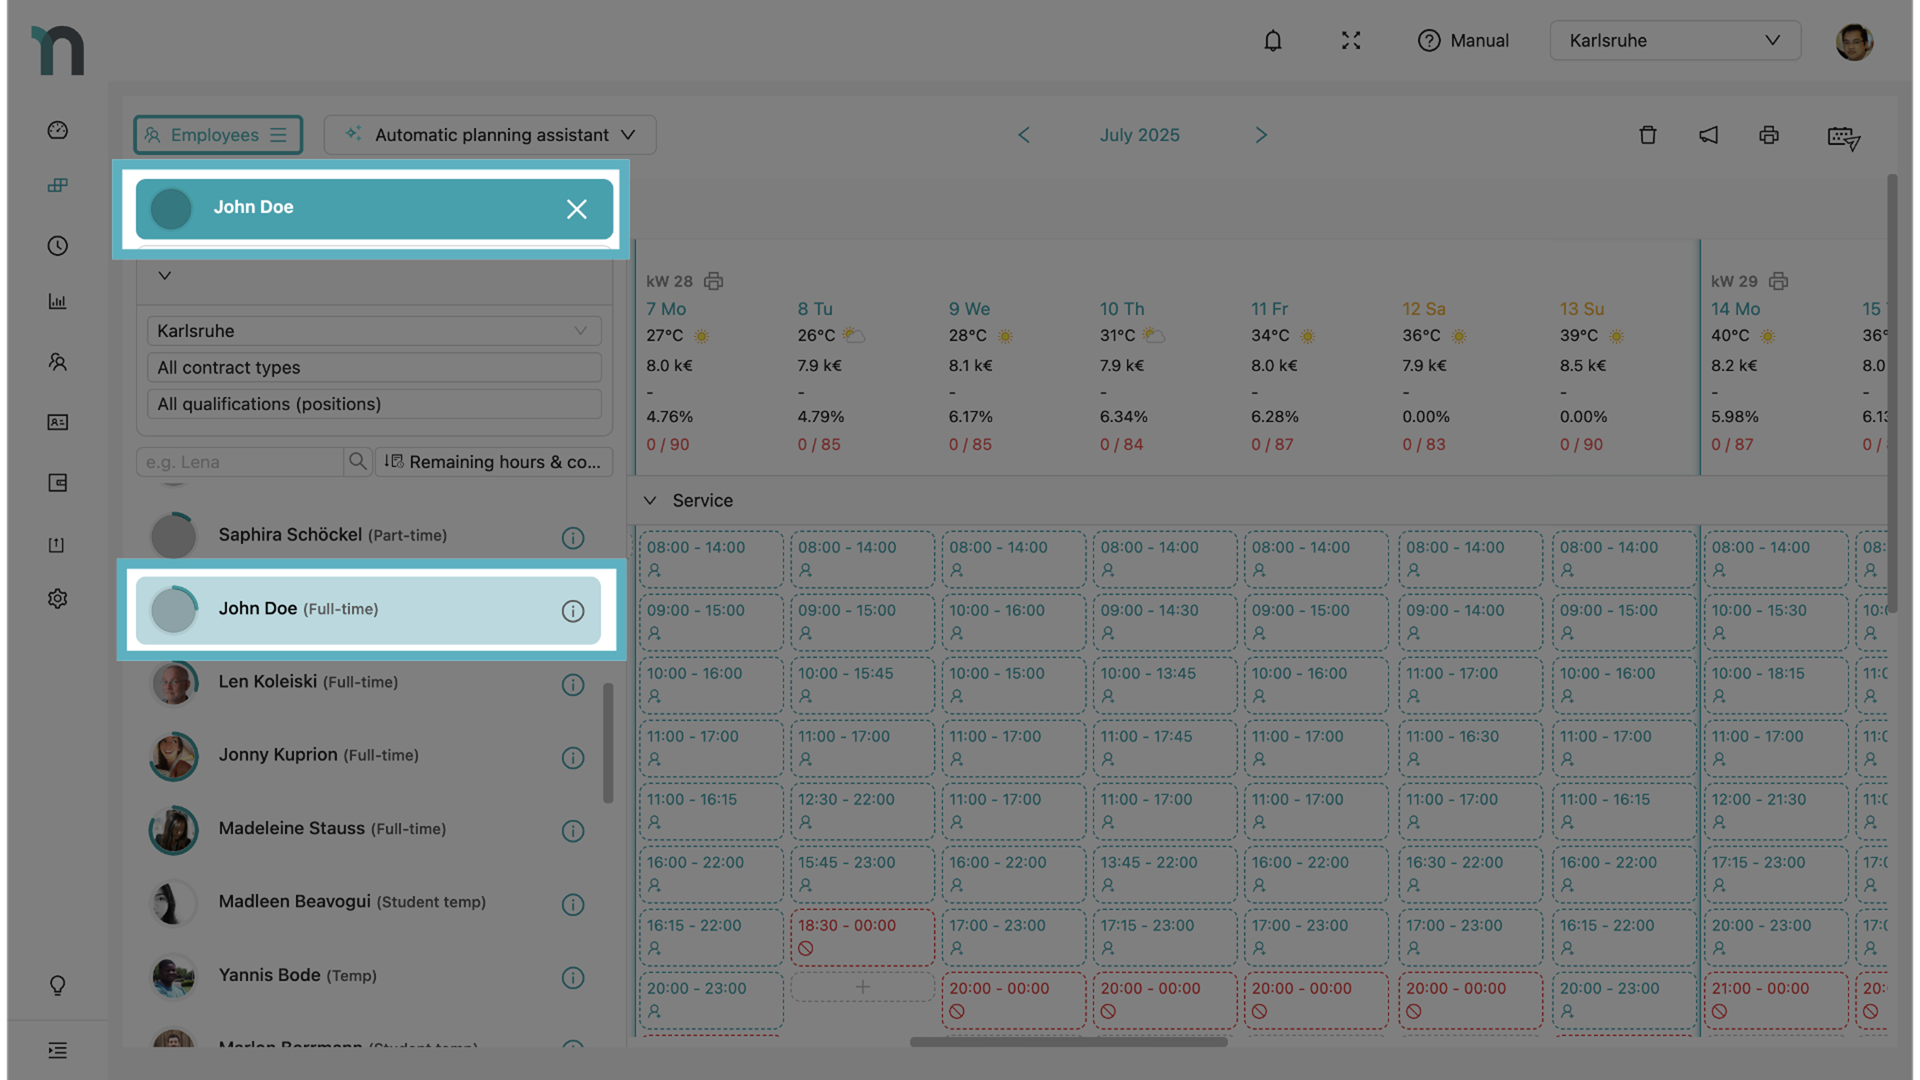
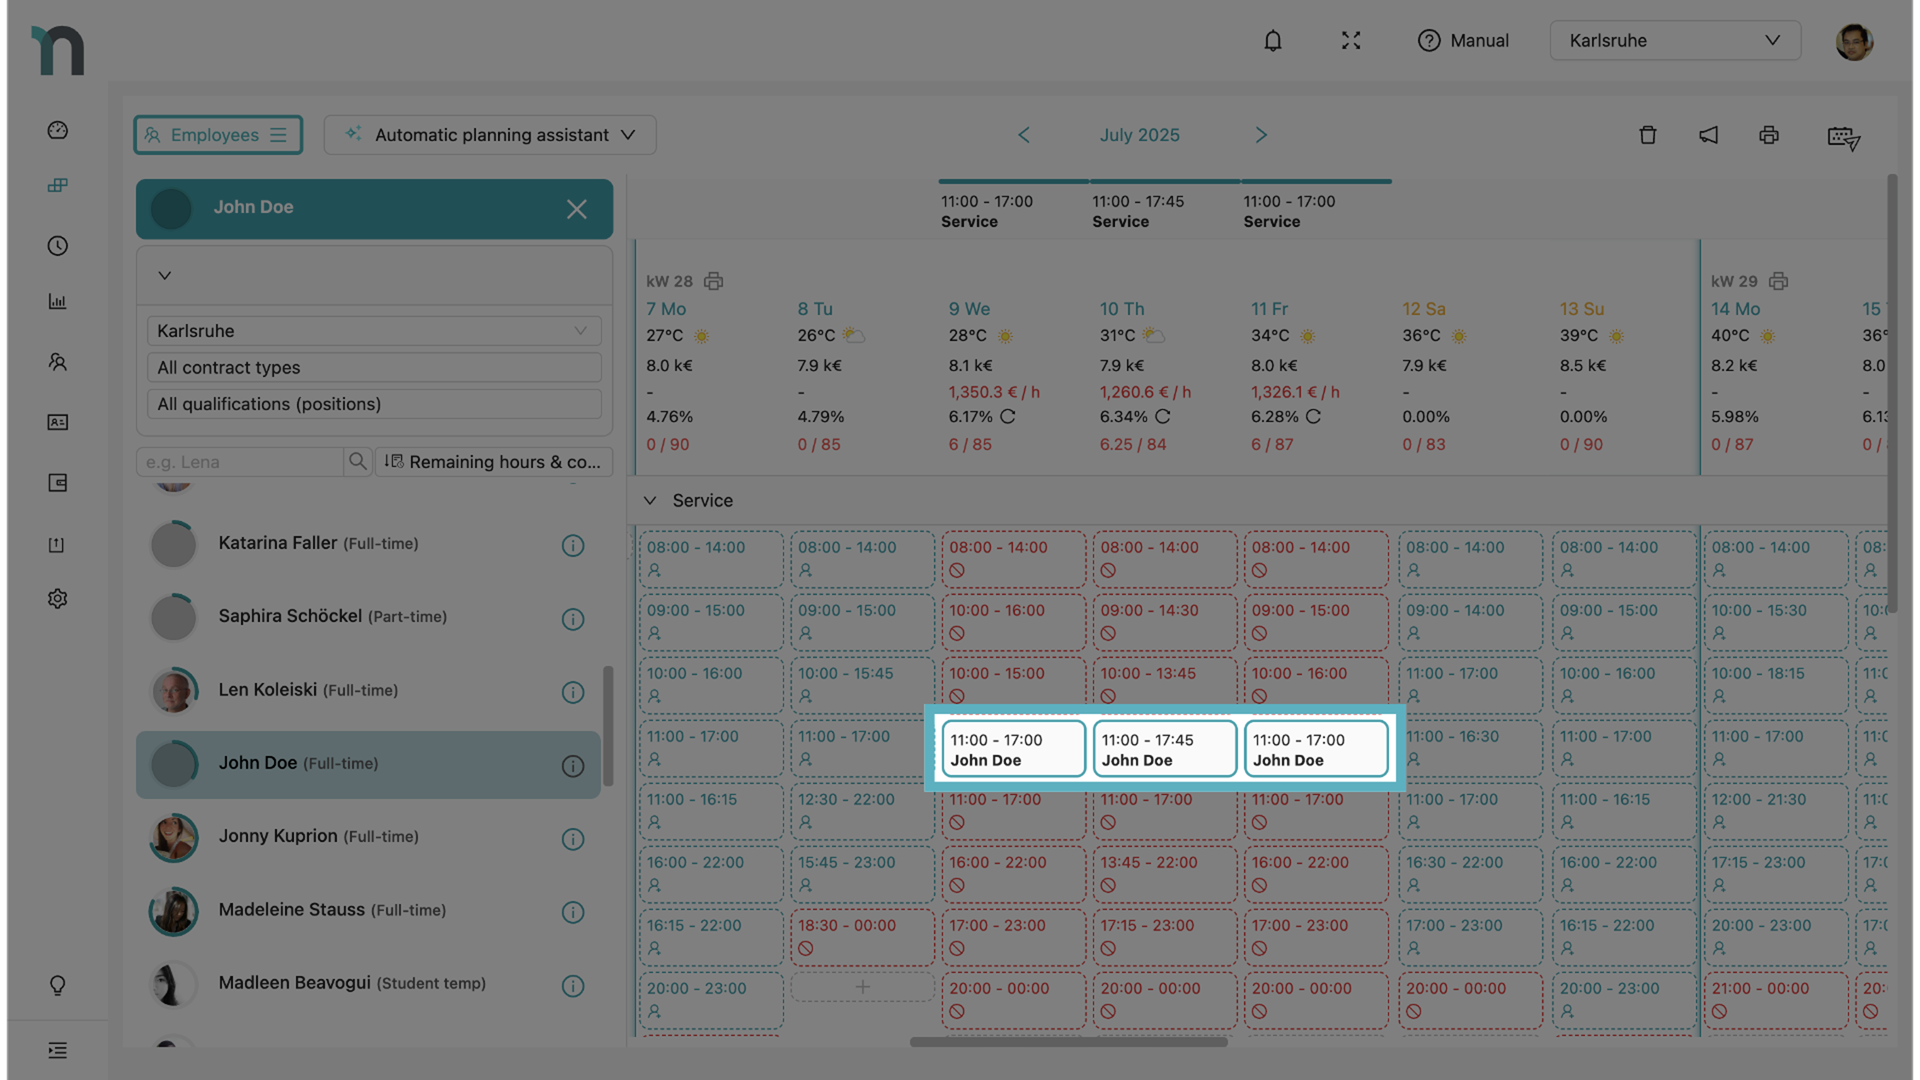
Then click consecutively on proposed or empty shifts. The selected employee will be assigned directly to the shifts.
To deselect the employee again, you have three options:
If the employee list is expanded, you can deselect the employee by clicking on them.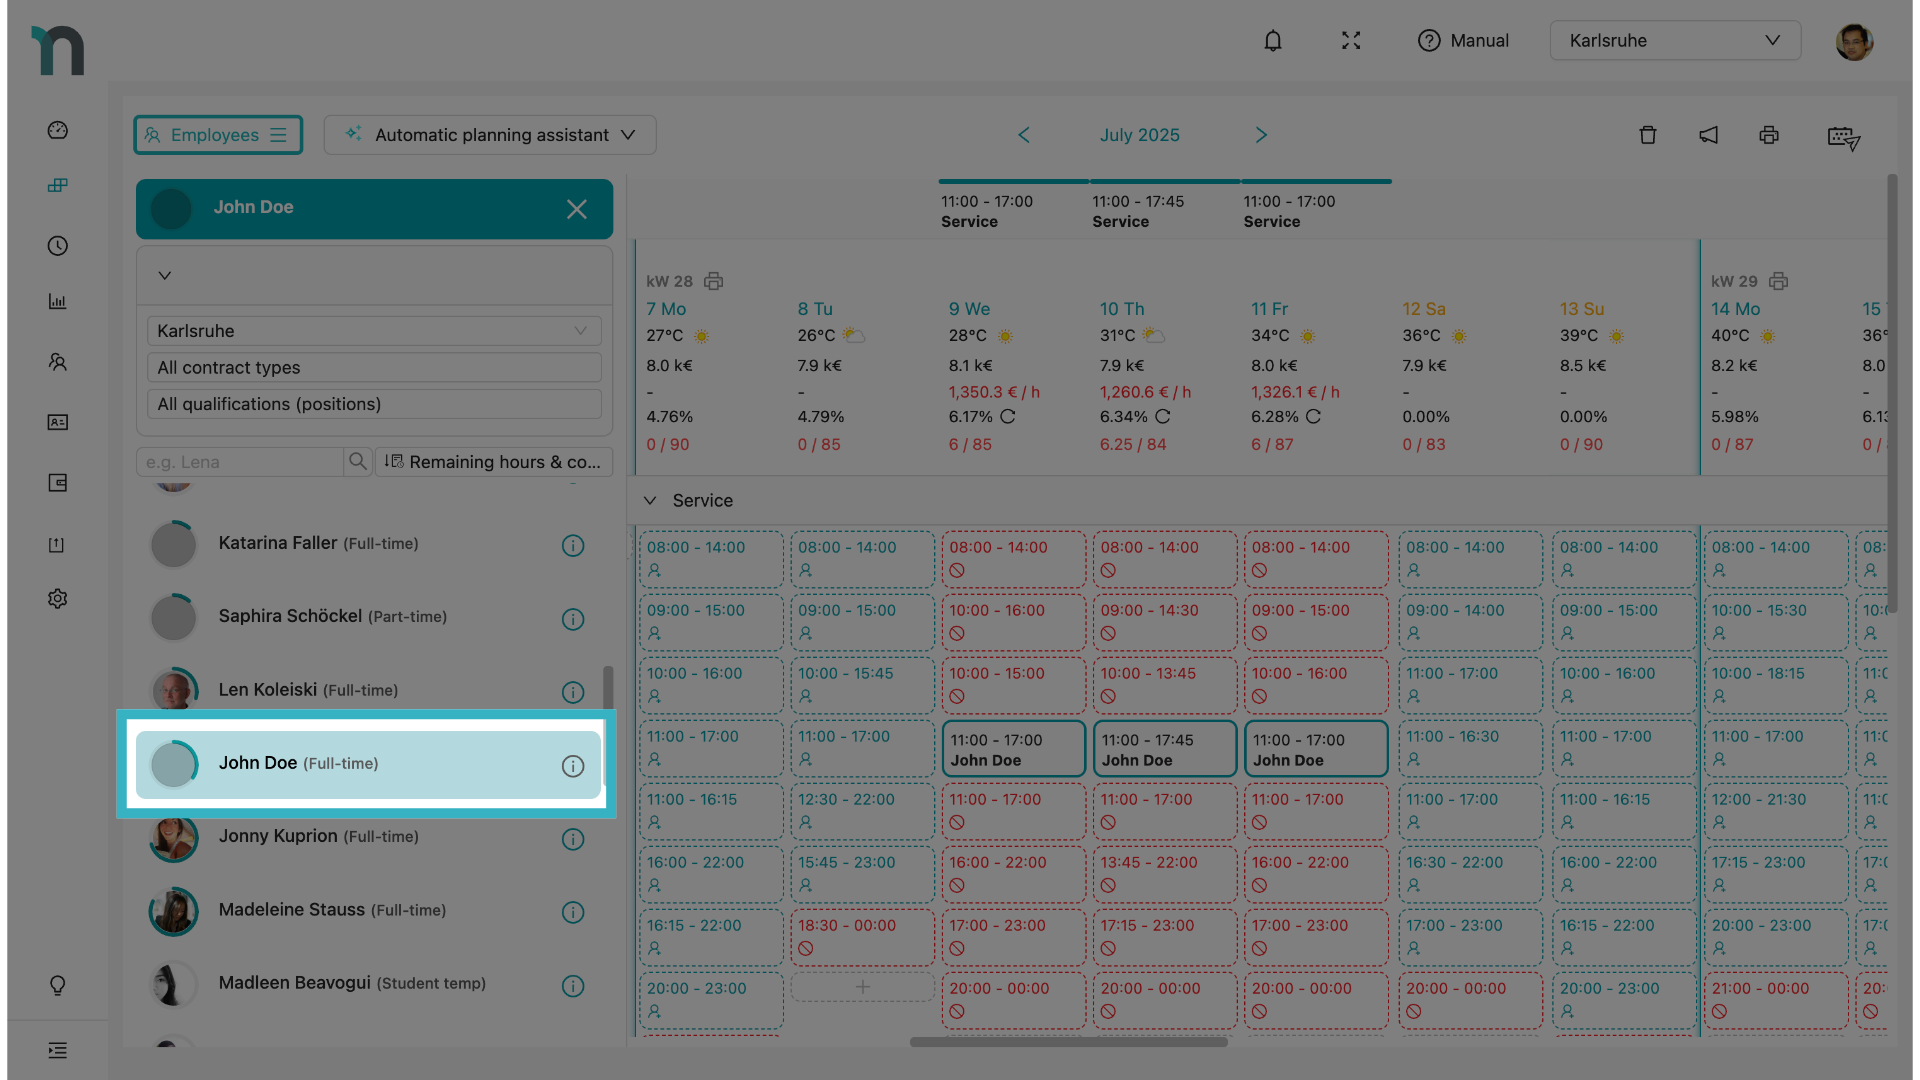
If the employee list is collapsed, click on the avatar in the upper right corner to deselect the employee.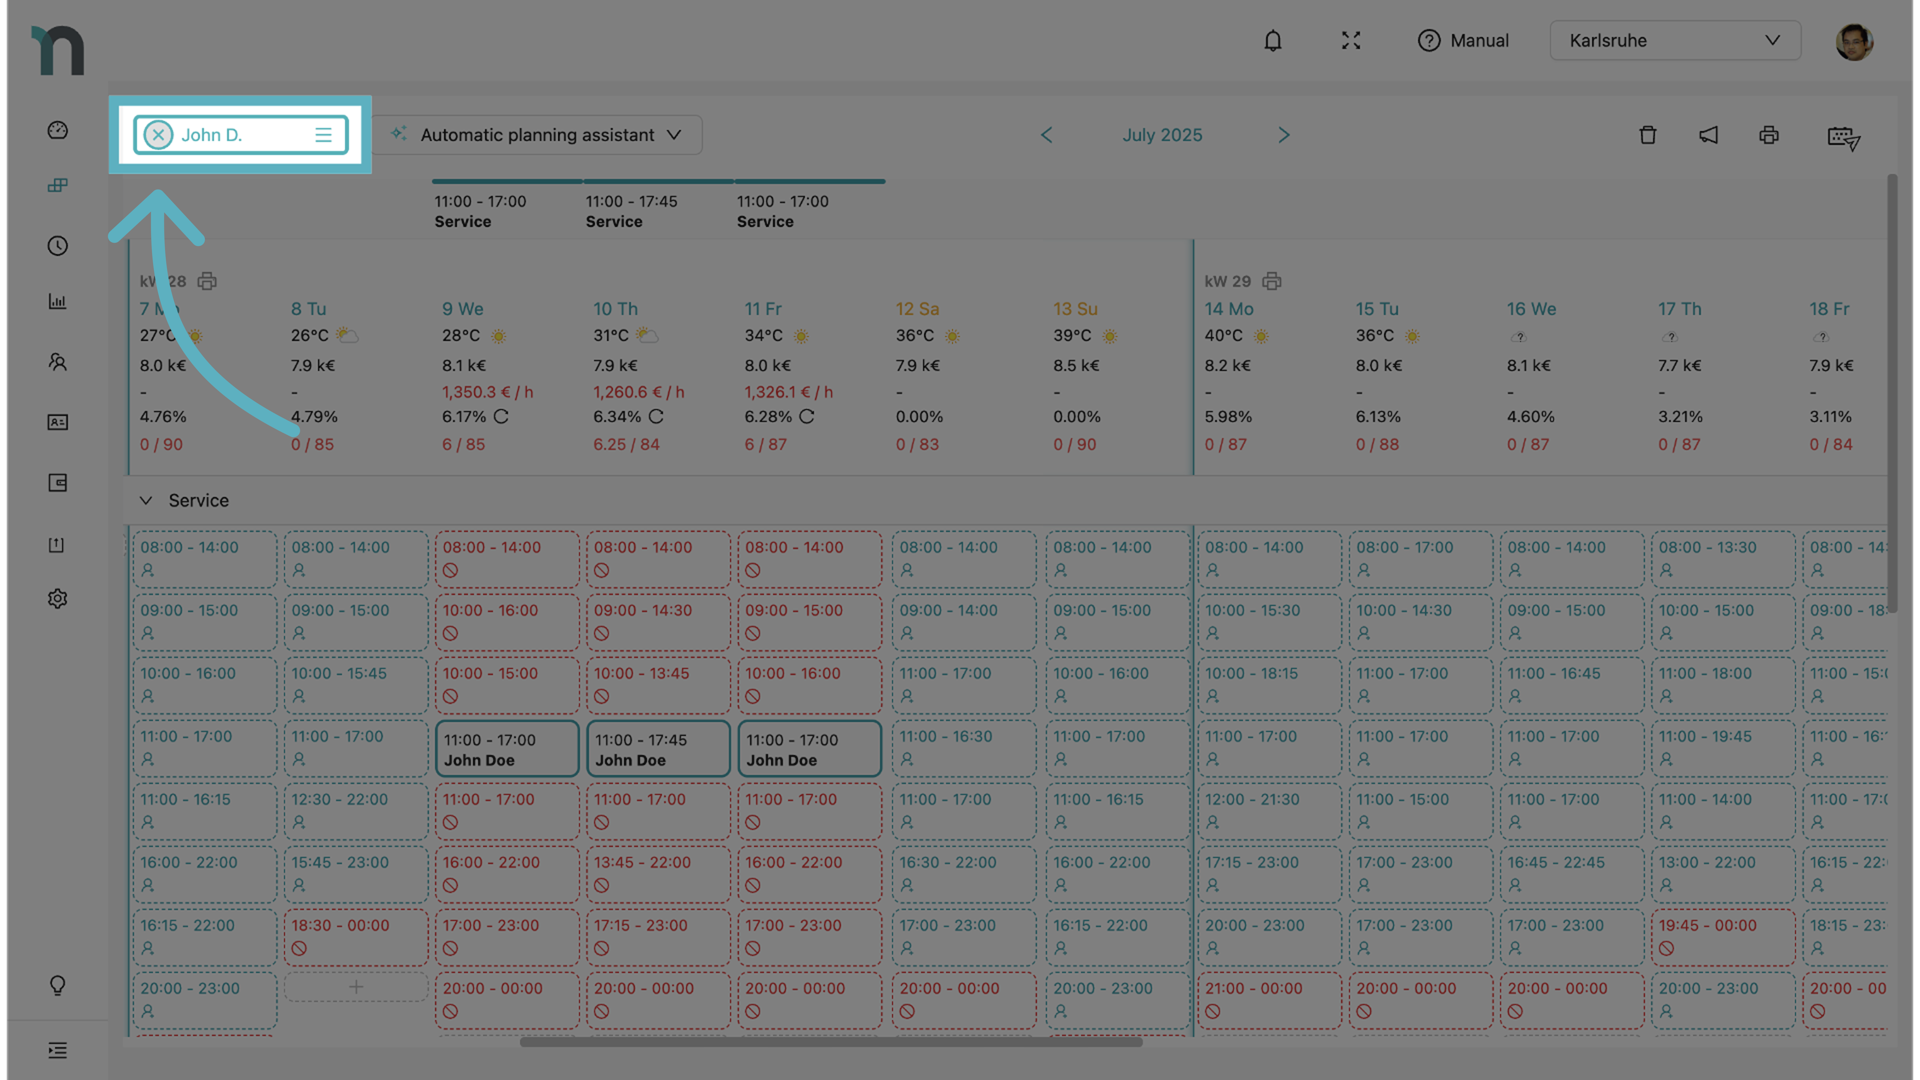
Alternatively, you can also deselect the employee by clicking on the selected shift.
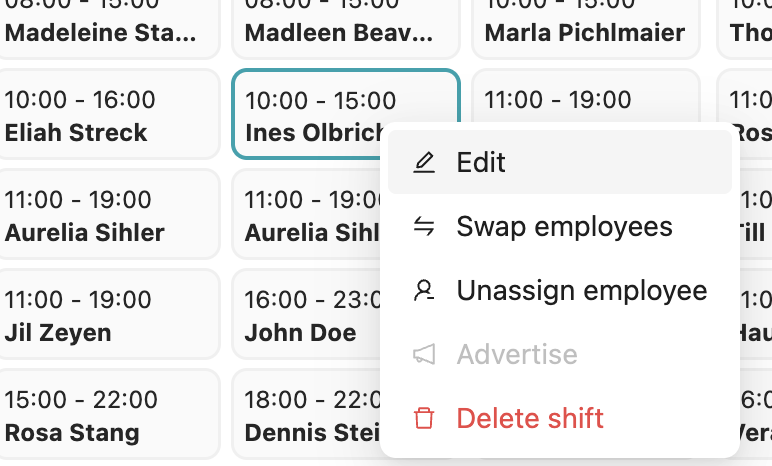
Adding shift notes
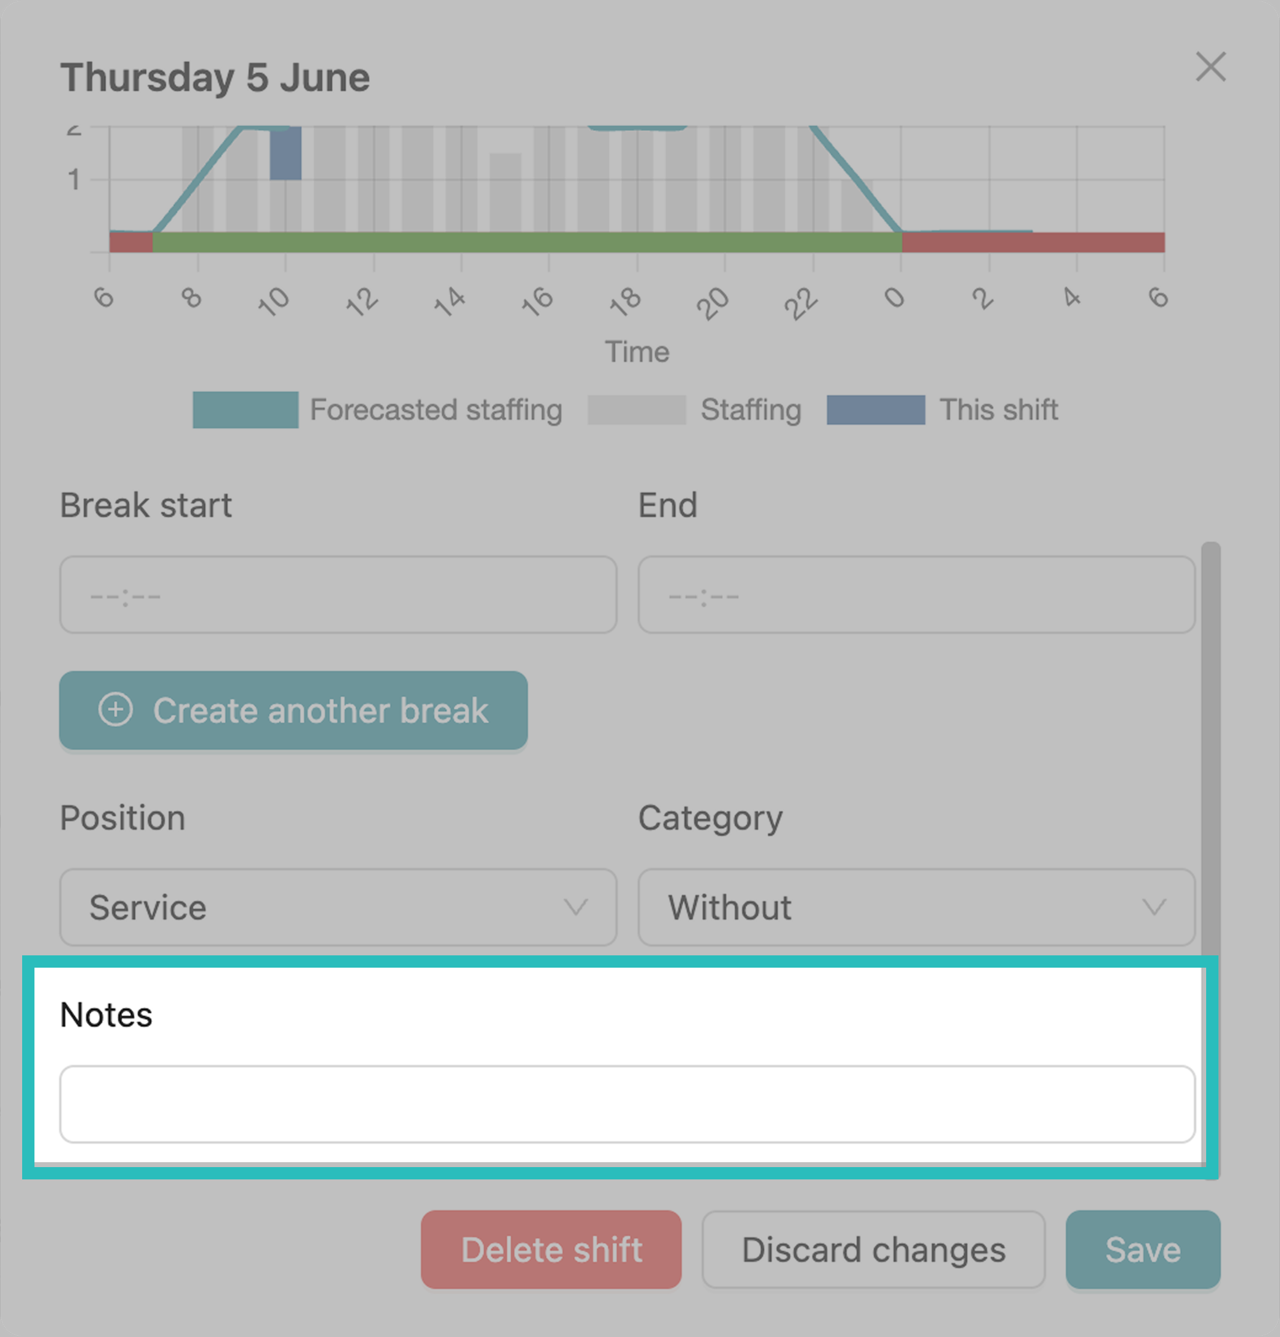
To add a note to a specific shift, right-click on the respective shift and select “Edit.” Alternatively, you can double-click on the desired shift.
The following window will open, where you can enter a note at the bottom.
Deleting and replanning shift plans
If you are not satisfied with the shift plan, you can click the trash can icon at the top right to delete the shift plan for a selected period. You can choose to delete only the employees or remove the entire shift proposals. Afterwards, you can select whether you want to delete all or only certain positions.
How to advertise unfilled shifts can be found here!
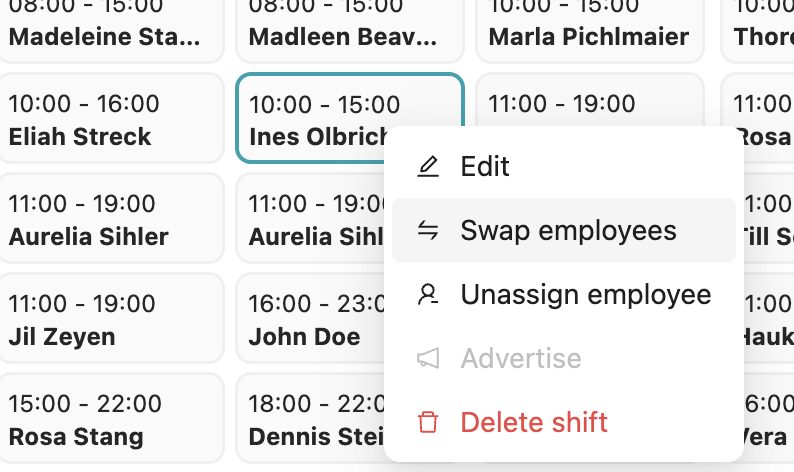
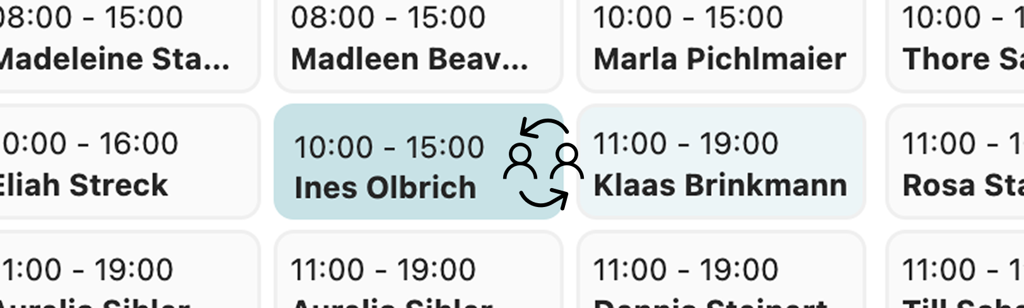
Swapping shifts
To swap two people, right-click on the first person. A swap icon will appear. With this, you can click on the second person and the shifts will be swapped automatically.
Creating rest days
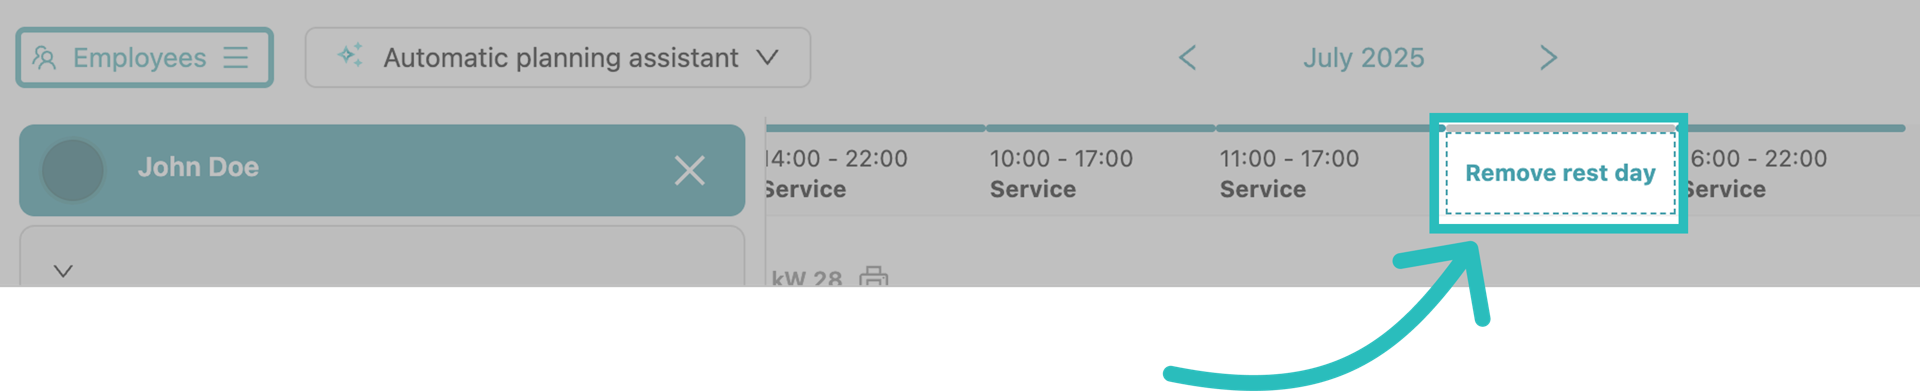
To create a desired day off for certain employees in the monthly planner so that they are not scheduled, the employee bar must be expanded. Click on the respective person. Then click on the moon icon on the corresponding day. The employee will now not be scheduled on that day.


To remove the rest day, click on the added rest day.
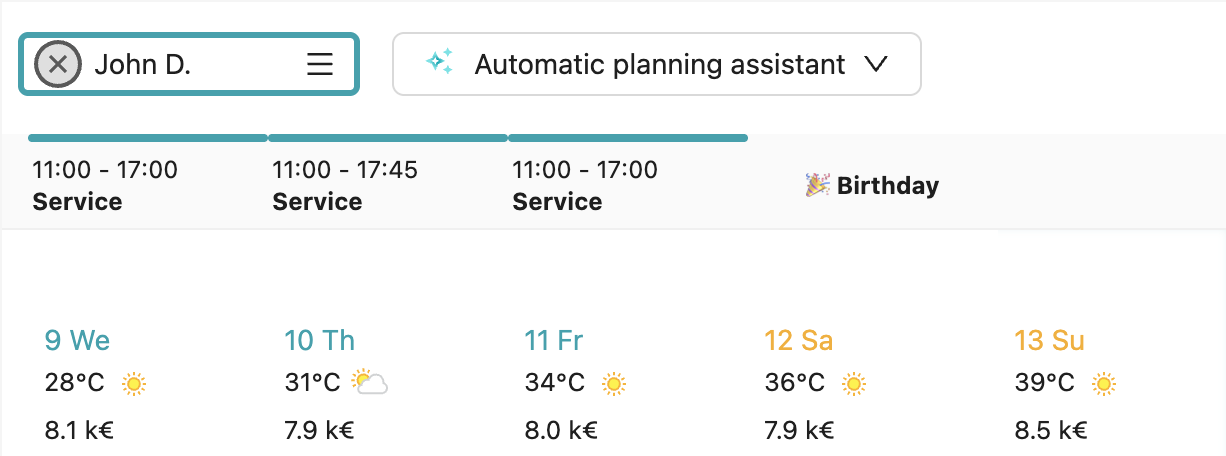
Birthdays
Birthdays of employees are displayed both in the employee planner and in the monthly planner. Birthdays are only visible to users who have access to the master data (General).